How I set up Object Detection to improve my custom home CCTV/NVR.
In my previous post I talked about how I improved the reliability and coverage of cameras in my parents rural property using inexpensive hardware. If you are looking for information regarding network configuration and which cameras I’m using, you should check out that post.
In this post I’m going to share how I configured a software called Frigate NVR to use AI object detection models to record events only when I have motion of people, cars and other categories of objects in my cameras, saving me a lot of storage and also keeping only what’s is really important on my archive.
The Software - Frigate NVR
There are a lot of free NVR solutions out there, others that even provide AI capabilities as well, but I chose Frigate because it was easily deployable using docker (saving troubleshooting for potential installation problems and being agnostic of operating system), easily integrated on Home Assistant and having somewhat good documentation.
To begin with the installation, I had to choose in which Hardware I was going to run Frigate, and I decided to test out the Radxa-X2L, a x86 Single Board Computer (SoC) with a 4-core Intel J4125 and 4GB of LPDDR4 RAM. This SoC is great because being an x86 I can run any operating system without worrying about compatibility, also, it’s quite powerful and has tons of support.
The operating system that I choose was the lightest Debian derivative that I know of: DietPi. With DietPi I could install an image compatible with x86 computers that has the lowest number of processes that I know of on idle and at the stock configuration. Also, it has great support and documentation and is really simple to manage and install other software (such as Docker).
Installing/Running Frigate
As I said before, you do not need to install Frigate, as it is contained on a docker container: to run it you need to start a container with a docker run command or a docker compose file. Below you can see my file (also you can get it on my GitHub):
docker-compose.yml
1
2
3
4
5
6
7
8
9
10
11
12
13
14
15
16
17
18
19
20
21
22
23
24
version: "3.9"

services:
  frigate:
    container_name: frigate
    image: ghcr.io/blakeblackshear/frigate:stable
    privileged: true
    cap_add:
      - CAP_PERFMON
    restart: unless-stopped
    shm_size: "2g" # adjust based on the number of cameras and resolution
    volumes:
      - /dev/apex_0:/dev/apex_0
      - /etc/localtime:/etc/localtime:ro
      - /DATA/AppData/frigate/config:/config
      - /DATA/AppData/frigate/media:/media
    ports:
      - "80:5000" # Web UI
      - "8554:8554" # RTSP feeds
      - "8555:8555/tcp" # WebRTC over tcp
      - "8555:8555/udp" # WebRTC over udp
    environment:
      - FRIGATE_RTSP_PASSWORD="password"
      - LIBVA_DRIVER_NAME=i965
Some considerations that you must have are the shm size that needs to be calculated based on the number of cameras you have (check out the documentation). Also, under devices (/dev/apex_0:/dev/apex_0), you should see that I’m using a Google Coral TPU board, this is a addon board that is connected to the M.2-E connection of the Radxa-X2L where a WiFi card would be used. The Coral board is going to run the AI models, instead of using the onboard Intel processor.
It is possible to use the onboard Intel processor and I even started using it, when I had only 3 cameras configured, but it was simply too much computing and the processor was always at 100% utilization and running really warm even with the official cooler. So I followed the Frigate’s recommendation and bought a Coral TPU board. Now, all AI processing is running on the TPU, I have 7 cameras and room for more!
Finally I want to call your attention to the config file that is listed on the compose. Mine can be seen on the next section, but you will need to have one with at least one camera configured for Frigate to start.
You may also want to change your ports and other configuration and for that I recommend the official documentation.
Having your docker-compose.yml file ready, you just need to run the following command and start the server (assuming you have Docker installed and configured):
docker compose up
Configuring Frigate
With Frigate running you have a lot of options and configurations to choose from, and although the documentation is fairly complete, I still think it needs some videos showing how things work. That being said, I’m not a specialist in Frigate, far form that. So I’m going to share my configuration and try to explain everything that I did.
In the code snippet below you will see part of my config file, as I have multiple cameras and many things are repeated for those cameras. Check out my GitHub for the complete file.
1
2
3
4
5
6
7
8
9
10
11
12
13
14
15
16
17
18
19
20
21
22
23
24
25
26
27
28
29
30
31
32
33
34
35
36
37
38
39
40
41
42
43
44
45
46
47
48
49
50
51
52
mqtt:
  enabled: false
birdseye:
  enabled: true
  mode: continuous
  quality: 10
objects:
  track:
  - person
  - car
detectors:
  coral:
    type: edgetpu
    device: pci
cameras:
  Entrada:
    birdseye:
      enabled: true
    enabled: true
    ffmpeg:
      input_args: preset-rtsp-udp
      inputs:
      - path: rtsp://admin:admin@192.168.1.11:554/onvif1
        input_args: preset-rtsp-udp
        roles:
        - detect
        - record
    detect:
      width: 1280
      height: 720
      fps: 15
    record:
      enabled: true
      events:
        required_zones:
        - entrada_portao
        - portao_rua
      retain:
        days: 30
        mode: motion
    zones:
      entrada_portao:
        inertia: 1
        coordinates: 868,221,866,127,1280,50,1280,720,447,720,359,720,296,419
        objects:
        - person
        - car
      portao_rua:
        coordinates: 341,566,838,399,786,180,283,303
        objects:
        - person
...
In this config file there are some interesting things. First, it’s clear that I’m not using mqtt as it’s not enabled. Also, I don’t really use the Birdseye, it’s enabled, but I only set up one camera for it. On line 7 I’m enabling the tracking of the categories person and car (There is a list of objects that can be tracked on the docs - also, you could add even more with custom models). On line 11 I set up the use of my Coral TPU to be used for the AI tasks and then on line 15 I start to add the cameras.
For camera “Entrada”, I’m configuring an input url that uses the RTSP protocol and say that it should use this feed to detect and record. I also set up the width and height for running the AI model with object detection. It’s important to note that I could use a lower resolution and also lower the fps for object detection, but, for now, it’s running well.
I also set up two zones, the first “entrada_portao” has its coordinates and will check and record only when detecting a car or a person. The second, “portao_rua” will only record when a person is detected. I did this because the second zone contains part of the street and I don’t want recordings of random cars that are running on the street. This is a great flexibility of using this kind of NVR recording.
Additionaly, I have other cameras that are more internal in the property and I have 3 dogs and 1 cat and I don’t want the cameras to generate events for every time my pets move, so I set up the AI to not look for them.
There are also more interesting things that can be done, as setting zones with stationary objects that should be ignored (for example, a parked car in it’s parking spot) and I do use many of these settings and you can check it out on the complete configuration or also on the Frigate Docs.
Hardware Usage and other metrics
In the animation below, I share the hardware usage of the SBC running this instance of Frigate. As you can see, the CPU is pretty busy with ffmpeg processing and recording of videos. But you can also see in the processes that the frigate detector is using the Coral TPU. Also, I’m using almost all memory and currently I have a 1TB SSD that is being almost completely used to store files (I set up the files to be preserved for 1 month).
As you can see, the computer is pretty busy, however, I could change some settings as lower the fps or resolution of the cameras to add even more.
For those curious for more, I also am adding some screenshots containing some System and Storage metrics and also a simple view of events and cameras.
 |
 |
 |
 |
Real Time CCTV Monitor
Finally, with the Frigate configured and running, I now have an intelligent DVR implementation that I can trust will record only what’s important. Now, another important feature that I needed to address is a live monitoring of the cameras, not all cameras, but mainly those that show the street and main access to the property as the actual house is about 150m from the gate and it’s useful to see who is at the gate before answering.
We do have a smart doorbell: an Intelbras Allo w3+. It’s pretty old at this point and it only works with a WiFi connection and works well most of the time. It is good at showing to our smartphones when someone has clicked the doorbell, but the live feed is not stable and the angle of the camera is also not great. Therefore, another way to see the gate is necessary.
For this purpose, I bought a cheap 11” monitor with a resolution of 1366x768px. It’s not much, but it’s going to stay in the living room, next to the TV so that my parents can monitor things with ease when they are relaxing and/or watching TV.
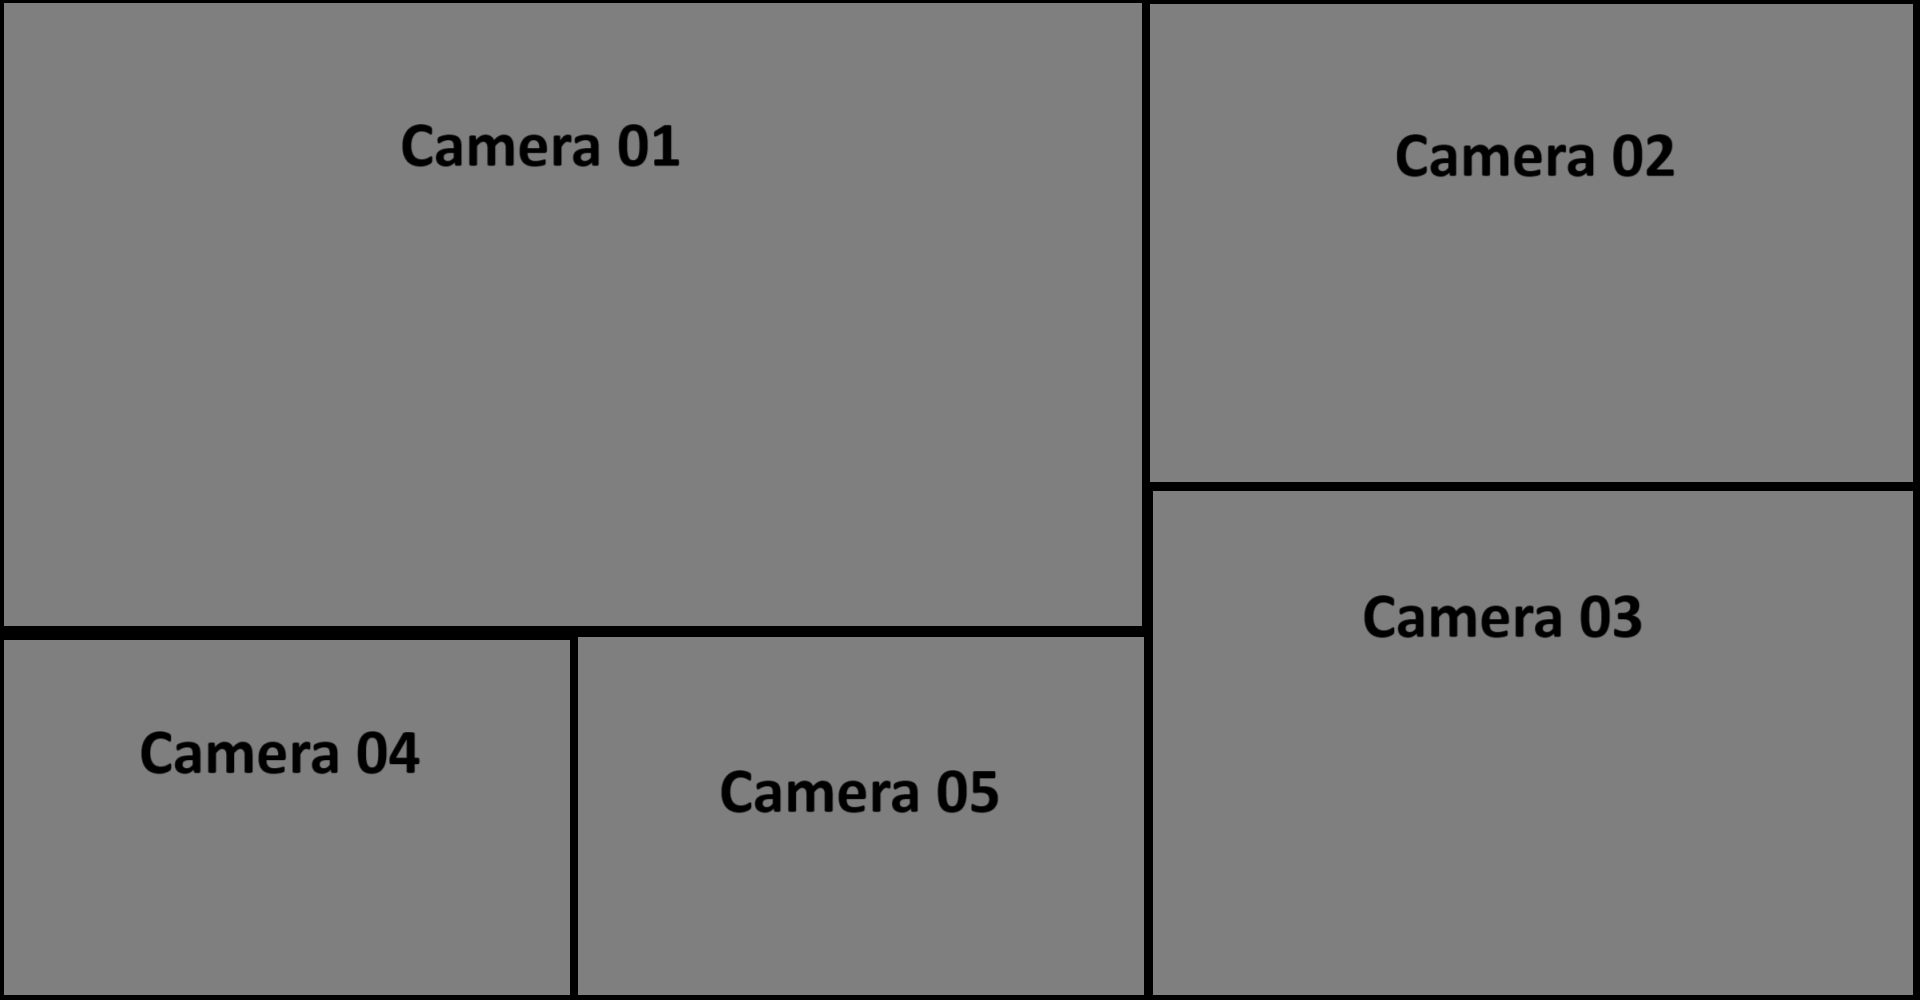
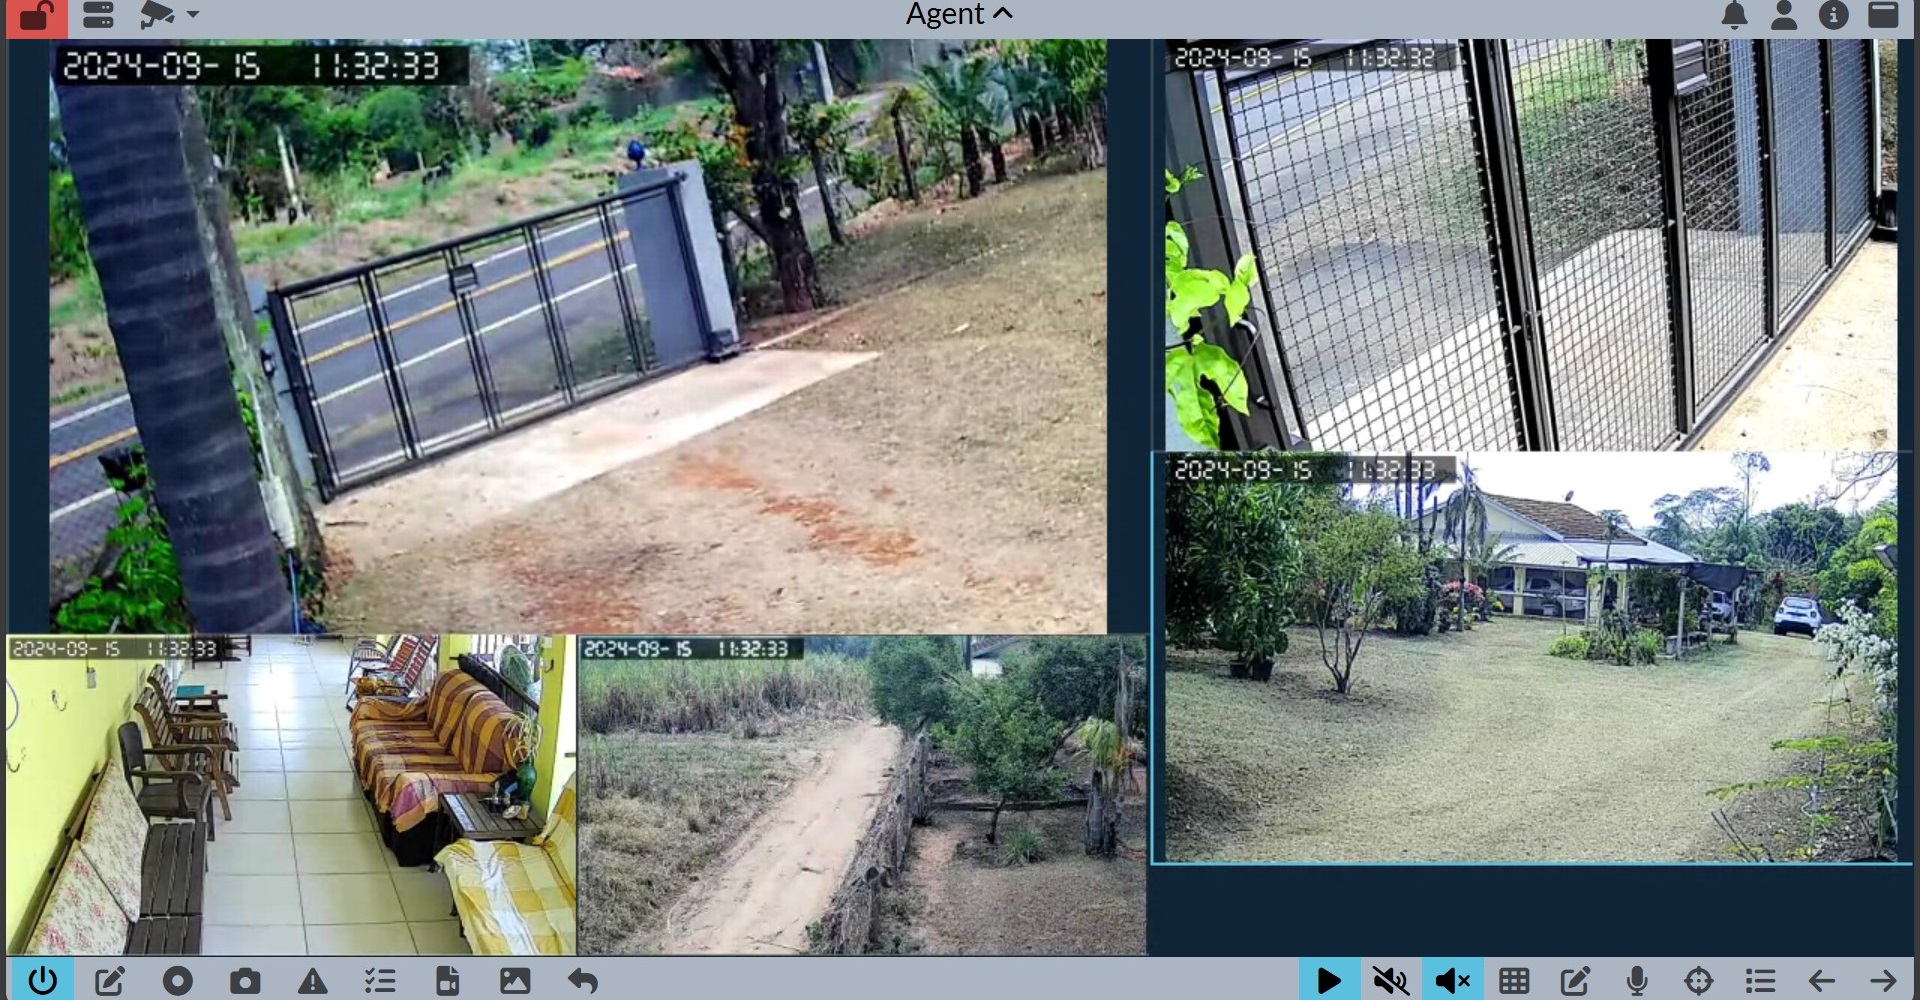
Also, I wanted to have a custom layout where I would have a main camera and other cameras in smaller sections, such as the image below. That lead me to a rabbit hole trying to find the perfect software that would run on a Raspberry Pi 3B+ that I had laying around and would display RTSP streams with different encodings.

I ended up testing a lot of options (VLC, Moonfire NVR, RPISurv, CamPlayer, Motion, Frigate Birdseye, Camera.ui and more), however, they either did not offer the option to run the layout I wanted, or they ran on an older version of Debian, or would not be enough optimized to run several streams of a Pi 3B+.
Finally, the solution came with a software called Agent DVR. This solution has the possibility of recording and live viewing of cameras, and even has some AI capabilities, however, I disabled everything but the live viewing and it allowed me to create a custom layout and run 5 cameras on the Pi.

In the end, the Pi can run the 5 feeds, but that’s it. I even tried 6, but it would start to drop frames or streams. But I am ok with only 5 feeds, and if I ever want more, I can just use a Pi 4 or 5.
Conclusions
In the end I’ve achieved everything I wanted and this system has been running for about a month without problems (or with minor ones). In this post I tried to showcase how we can use AI to help with security monitoring on video streams in a real world scenario, without specific knowledge about AI and with open source and/or free software.
If you have any questions about the setup, please, leave a comment and I will try to help.